The solution that mostly that gets thrown around is to model in some extra tolerance so when it comes off the printer everything will have a better chance of fitting. But that is sometimes easier said than done. If you are not using a CAD software where that solution can easily be implemented or if you downloaded a model that was not meant to be 3D printing or even if you don't want to ruin your model by adding hypothetical gaps in between your parts, no worries! There is an easy solution built into Cura.
Through my extensive testing of Ultimaker machines, I have come to realize that they error on the side of being over sized by 0.4 mm in the x/y axis to take into account a finishing process like sanding or chemical smoothing. But that is only helpful to the artists out there not so much the engineers or the people who want dimensional accurate parts straight off the printer. Luckily the fine folks at Ultimaker have programmed in a solution to this problem within Cura itself.
First things first I would recommend doing a quick test print on your machine to get a base line to start with.
Download Model Here
Step 1: Print this model. If you want to see how I quickly modeled this is Fusion 360 head over here
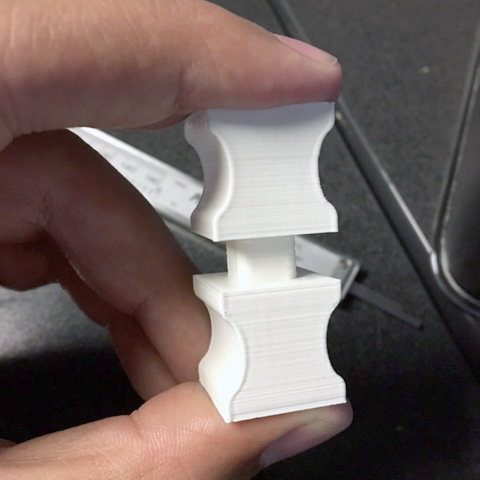
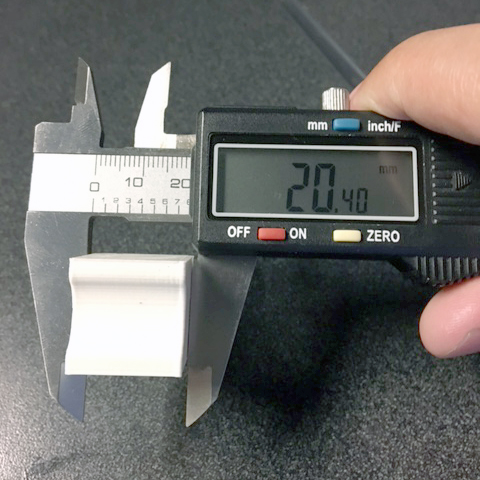
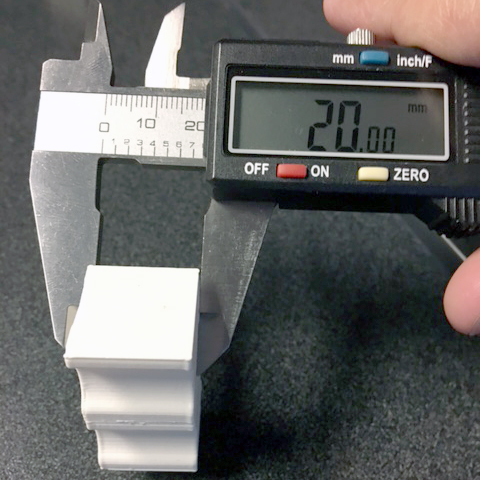
Step 2: Get out those calipers and measure your results. As you can see the parts were built right on top of each other and the goal is to make them fit perfectly together. Don't expect them to fit the first time you print.
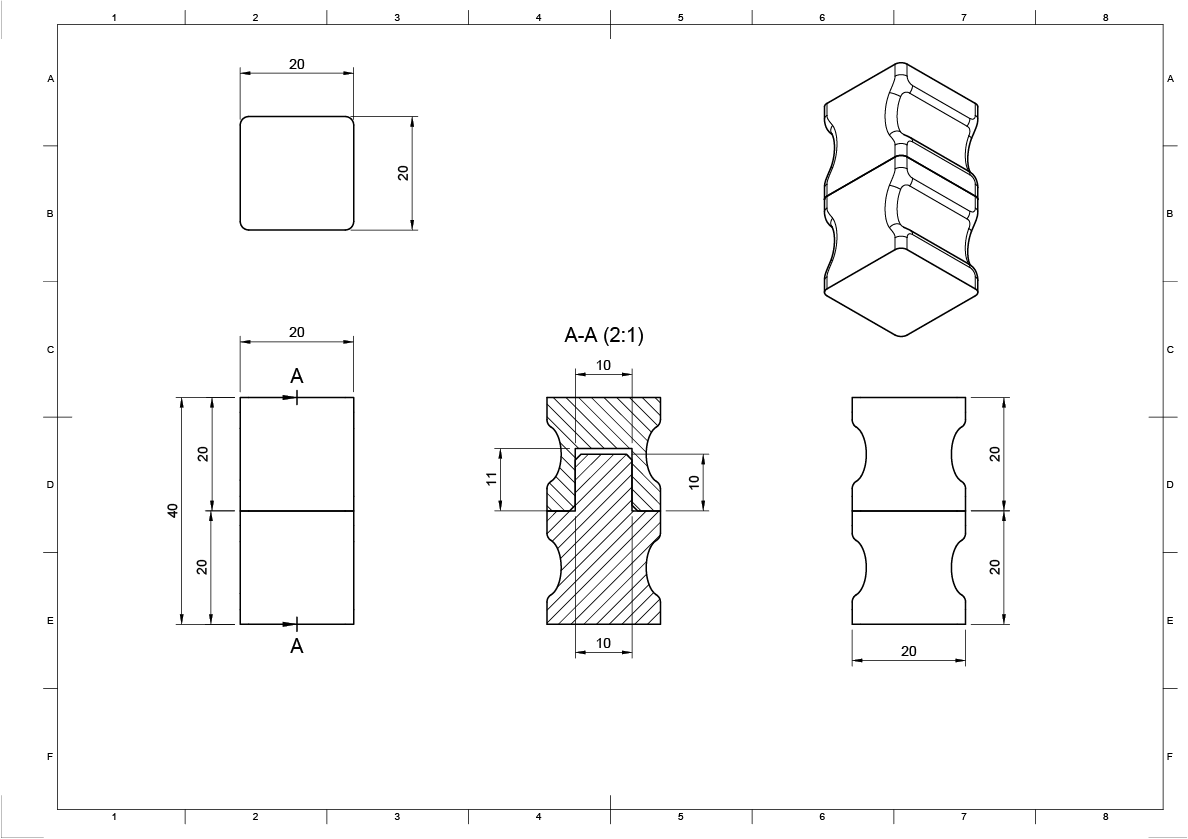
When I measured my results I got 20.4 mm on the outer dimension which is 0.4 mm wider than it should be according to the diagram above.
Step 3: Take the difference you see and divide it by -2
My part was 0.4 mm too wide so I will divide 0.4 by -2 and that equals -0.2
Step 4: Adjust the Horizontal Expansion setting in Cura. (By default this option is hidden, to unhide this option, follow these simple steps)
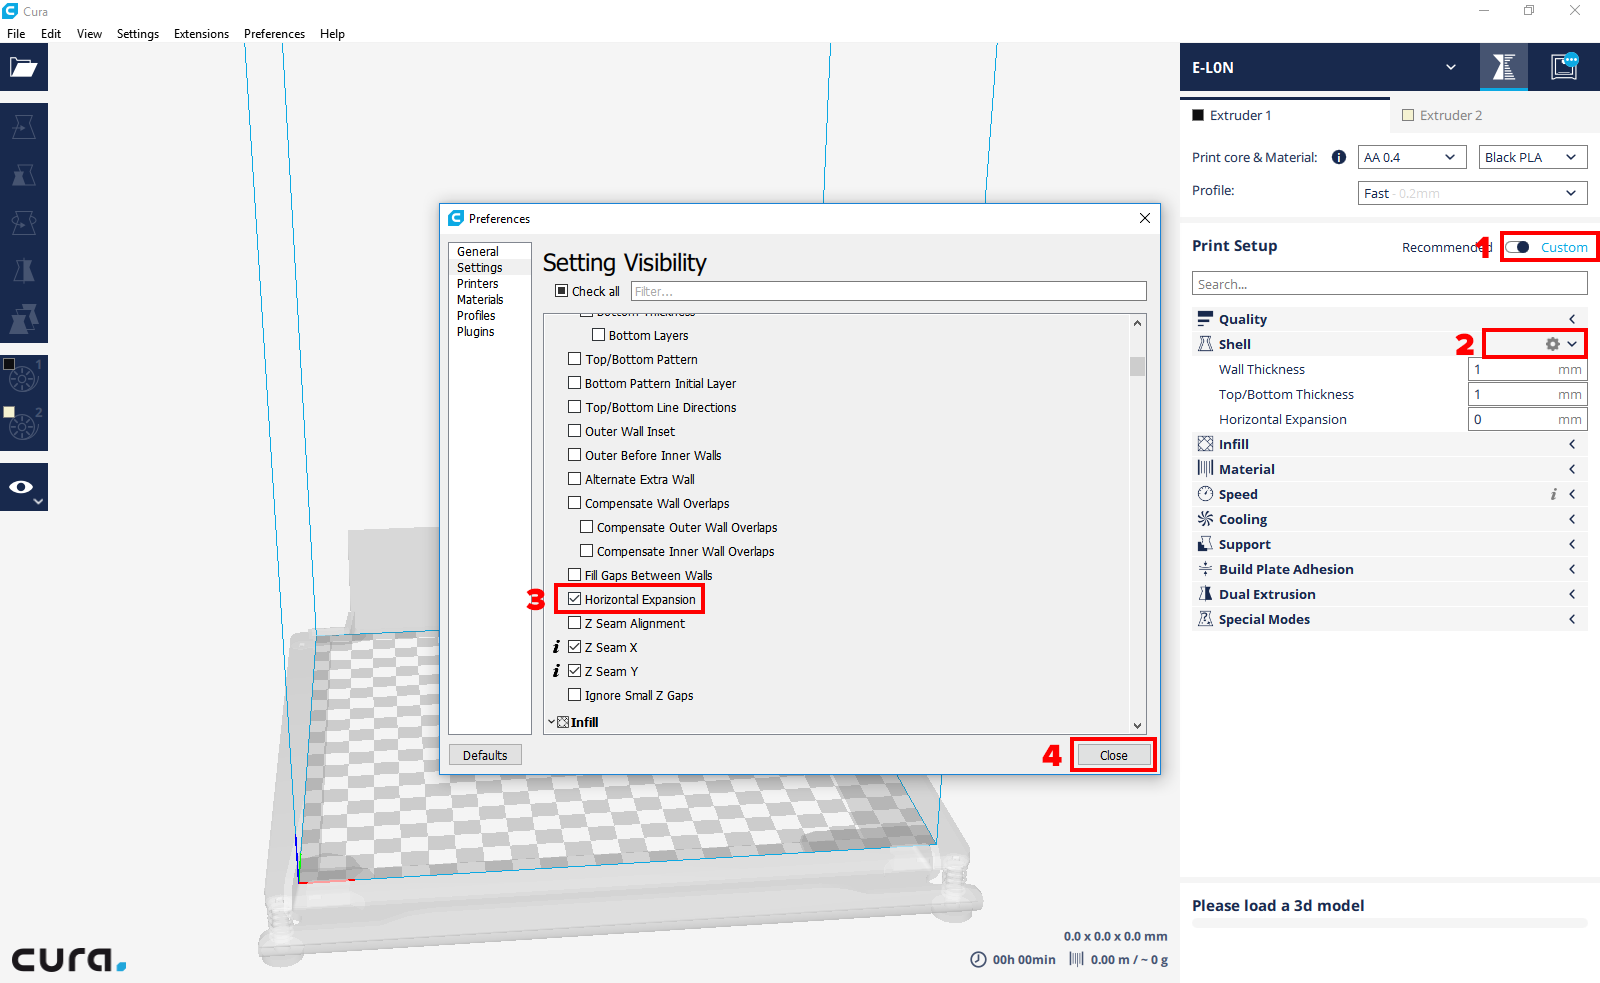
- Click Custom on the upper right
- Click the gear in the Shell dropdown. (when your mouse hovers near it, it will appear)
- Scroll down a tiny bit and check the box next to Horizontal Expansion.
Step 5: Type that into the Horizontal Expansion box and do another print.
 >
>
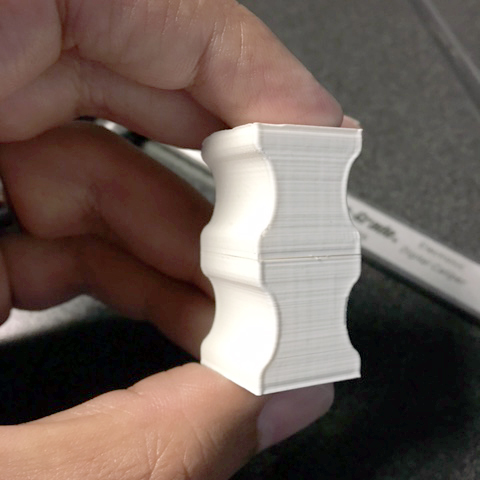
With a little bit of pressure you should be able to push them together and get a really tight fit.
 >
>
Step 6: If it's still too tight or if it's now too lose, adjust the Horizontal Expansion until you get that perfect fit!
Just remember to turn this feature off if you plan on doing dual color prints because this will cause a tiny gap between your parts and it wont look as nice.
I hope this helps and if you have any more questions please feel free to email me and I will be happy to assist you. Ryan @3dv.com