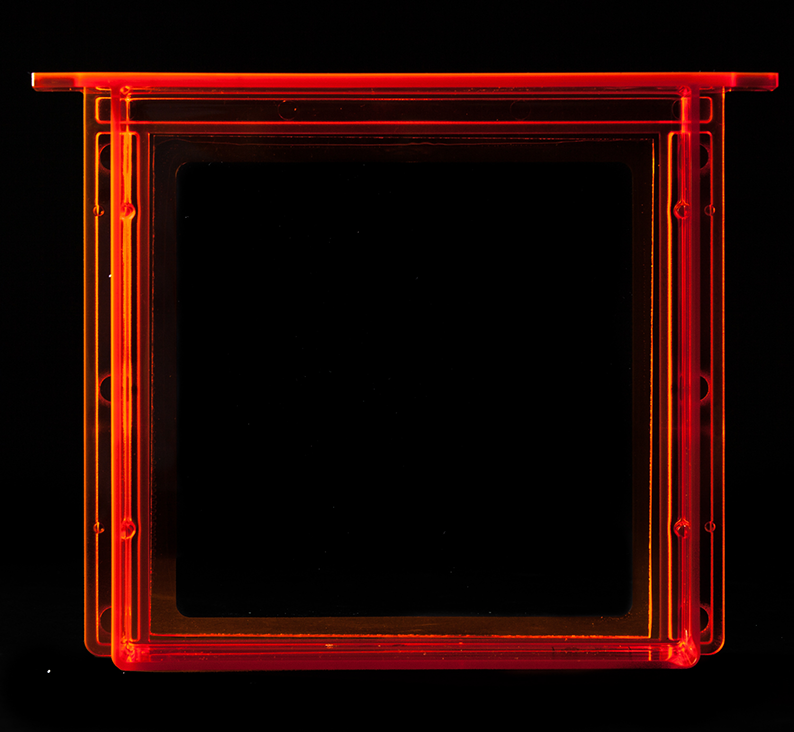
Form 2 Resin Tank
The Resin Tank blocks light and is made from shatter-resistant polycarbonate. It comes with a reusable lid and wiper, making it easy to stack tanks and store resin outside of the machine.
Keeping the Resin Tank Clean
The resin tank contains resin and maintains clarity in the optical path for the laser to properly cure resin. Clean resin tanks - inside and outside, and including clean resin - are a crucial component for successful prints. Make the most of each resin tank’s lifetime with proper care and inspection between prints. When using and storing your resin tanks, it is important to keep your resin tank clean to achieve high quality prints and prolong the life of your resin tanks.
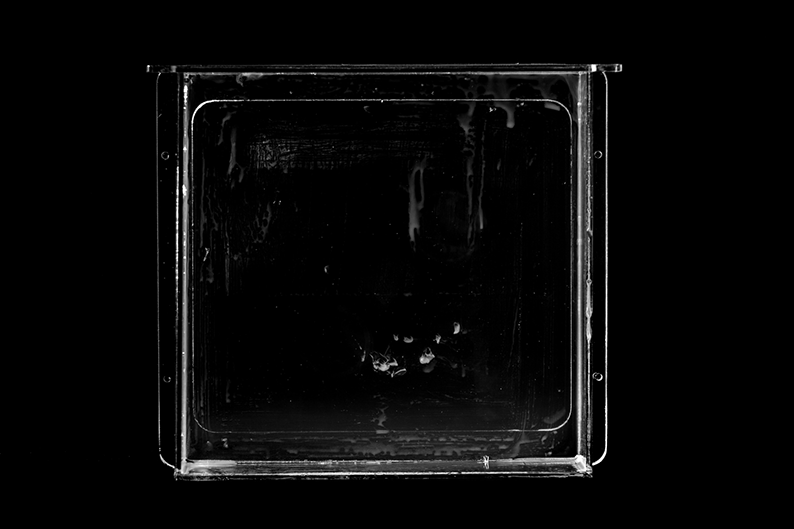
After several liters of resin, depending on the specific printed geometries, the resin tank’s surface will appear cloudy. How quickly the tank wears out will depend on many factors including layer height, resin type, whether you have used third-party resins with Open Mode, the number of prints you've done, their shape, and the orientation you've chosen for them. If small “raindrop” patterns appear after a few prints, that is not normally a cause for concern. When you start seeing an effect on your prints, we recommend changing to a new resin tank..
TIP
Always wear clean gloves when handling resin or optical surfaces.
Cleaning Inside the Tank
In addition to the wiper’s built-in tank maintenance, perform supplementary tank inspections to ensure the greatest success for subsequent prints during a tank’s lifetime. Each resin tank includes a new wiper, which helps prolong the lifetime of the resin tank by maintaining clarity of the optical surface. Between every layer of a print, the wiper slides across the surface of the resin tank - the PDMS or silicone layer - to properly agitate the resin, remove particulates from the optical path, and prevent pigments from settling. The wiper helps keep the silicone layer clean.
Separately from the wiper’s regular movement, it is important to use the scraper included with your finish kit to check the inside of the tank. A thorough tank inspection will ensure clean resin and help prevent pigment from settling on the silicone.
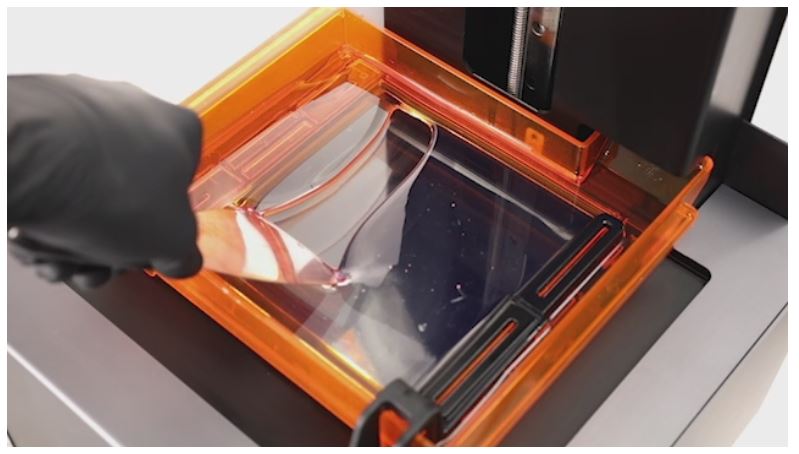
The best practice is to hold the scraper at a shallow angle, starting at the back edge of the tank, scanning the full surface of the tank before and after each print. Take care when touching the silicone; check for incomplete prints, scratches, or settled resin.
You should be able to remove resin with the scraper without damaging the tank, even if it is hardened. Clean the inside of the tank using the scraper/spatula only. If dirt, dust, or debris contaminates the resin, or if a failed print leaves bits of partially cured resin, these particles will block the laser from printing parts and the resin itself may need to be cleaned. Use a fine-toothed comb to inspect the resin, or consider using paint filters with a mesh size of 190 microns to strain used resin for small particles. Do not use chemical cleaners, Novus, IPA, paper towels, or cloths inside the resin tank.
TIP
Be mindful and take care to protect the printer's optical path:
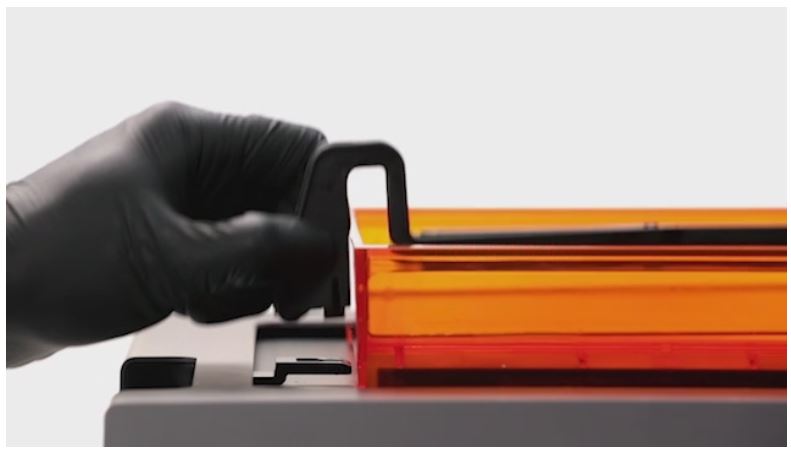
1. Always remove the build platform before removing the resin tank to avoid dripping leftover material into the printer body.
2. Hold the tank by the front tabs, sides or rim, to avoid getting fingerprints on the internal and external surfaces of the window.
3. Do not rub or scratch and do not allow resin on the underside of the tank.
Check your tank for scratches, gouges, clouding, or cured resin in the silicone layer and replace it, if necessary. Carefully follow these additional steps to return the resin and resin tank to printing condition after a failed print.
Cleaning Outside the Resin Tank
The silicone will allow a resin tank to print consistently for about 1-1.5 L of resin, depending on print settings. The clear window on the tank’s underside must be perfectly transparent for the best print results. Do not touch the plastic window with hands, and avoid resting any tank on an unprotected surface.
WARNING
Cleaning the bottom of the tank is only necessary if there are fingerprints/smears on the tank window, or resin on the sides. Do not use isopropyl alcohol (IPA) anywhere on the tank! This may cause it to crack.
1. Inspect the Empty Tank

When the tank is empty, use the glare from an outside light source to check the bottom surface of each tank.
2. Clean the Tank
Clean the tank’s clear acrylic with Novus 1 acrylic cleaner and a clean microfiber cloth.
3. Reinspect the Tank

Keep the sides of the tank clean, so that the lid does not stick to the acrylic material and to keep it from cracking. When removing the lid, if you lift it only from the front (which seems like the natural way to remove), it can put excessive stress on the pour spout and can cause the tank to crack. We recommend using the tabs on the sides of the lid to lift it with two hands straight off the tank.
Protect the ID Chip
Each resin tank has its own ID chip that the Form 2 uses to detect, track, and match the resin type with the proper resin cartridge. Uncured resin on the ID chip or tank carrier may cure with exposure to nominal electric current; cured resin will block the Form 2 from properly reading an inserted tank. Watch for the small ID chip on the underside when handling a tank and resin.
Resin Tank Storage
When choosing how to store resin tanks, consider how to protect the optical surfaces and prevent resin from curing. The tank’s orange material will block the wavelengths that cure resin, however, the top and bottom of every tank are open to light and should be protected. When stored outside the printer, the black lid is an excellent way to block exposure from the top; tanks with lids can be easily stacked.
As long as the resin has not surpassed its expiration, resin can stay in the tank for up to one month when stored in the printer, and up to two months when the tank is stored with the lid installed. Be mindful of the surface where tanks are stored. Prevent light from reflecting into the underside of the tank, or consider a dark storage location such as the tank’s original packaging box. Choose a place that prevents dust or abrasive objects from touching the tank window. Consider a low-lint towel underneath the tank’s bottom to protect it from scratches.
Replacing Your Resin Tank
The resin tank is an acrylic tray
with an optical window and silicone (PDMS) layer that contains the
liquid resin and assists the laser in curing the resin. After many
prints, the silicone layer in the resin tank will reach the end of its
life and the resin tank must be replaced. The tank might also require
replacement if damaged during use. The
life of a resin tank
can be prolonged with varying placement of models throughout the build
area, gentle handling of the tank, avoiding contact with the optical
window, and proper maintenance of the internal tray cavity.
 For successful prints, it's essential to use a transparent tank, free of any marks, scratches, fingerprints, or smudges.
Diagnosing a Damaged or Expired Tank
An
“expired” resin tank may cause print failures of many varieties,
including partially completed prints, poor base or support formation,
and in extreme cases - entirely failed prints. While many variables
determine when a resin tank expires, a well-maintained resin tank
typically lasts 1-2 bottles of resin or approximately 1000-2000 mL of
prints.
When new and when well-maintained, the silicone (PDMS) and
optical window offer an entirely unobstructed path for the laser to
enter the resin. However, damage to the silicone or optical window can
be detrimental to the Form 1+’s performance. Some resin tank issues,
such as clouding and cured resin, can be mitigated with
maintenance and care;
other forms of damage, such as gouges and scratches, require replacing
the tank. Optical clarity and a crystal clear tank are essential to
print performance.
 Gouged tank
 Gouged tank, close-up
 Cloudy tank regions
Scratches
A scratch in the silicone or optical window
may cause striations across a portion of the build platform. This is
because the scratch can deflect or block the laser from reaching the
designated position during the build. If the scratched area cannot be
avoided, the tank should be replaced.
Gouges
If the silicone is gouged, the laser will not
properly travel through the silicone layer, bending the light path in
the wrong direction, away from the point that is set to be cured. A
gouge is indicated by a piece of silicone torn away from the layer and
may result from improperly scraping the resin tank between builds. A
gouged tank requires replacement.
Clouding and Settled Pigment
Over time, the resin tank
can develop cloudy or foggy regions in the PDMS. This may happen for a
variety of reasons, especially in spots of heavy laser or peel activity.
For this reason, it’s important to make full use of all regions of the
build platform. Cloudy regions can also develop where pigment has
settled. Sometimes, clouding can be reduced or removed by
carefully moving the scraper against the PDMS.
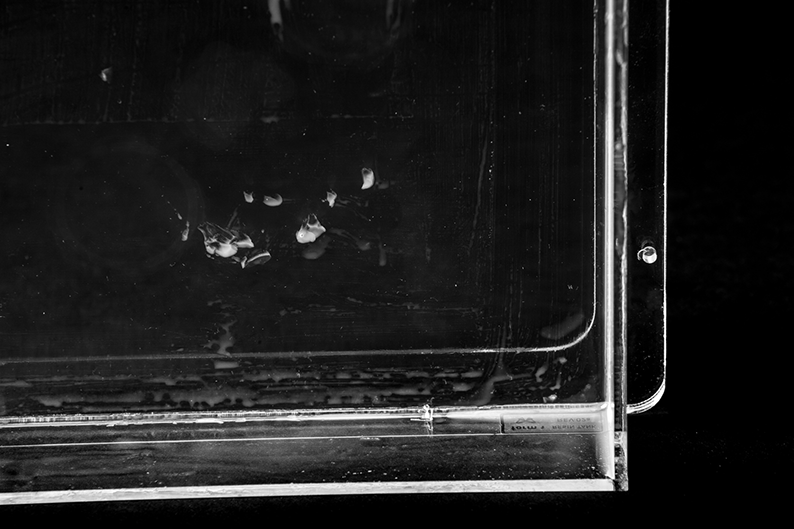
Cured Resin
In some print failures, resin may cure
against the silicone, rather than to the build platform. It is always
important to care for the resin tank and gently scrape the silicone
between builds. If you find small pieces floating or thin sheets of
resin on the silicone, follow our
instructions for cleaning your resin tank.
FORM TIP
Proper tank maintenance prevents damage and prolongs the life of the tank. Follow our resin tank care guide to keep your tanks crystal clear and ready to print.
Discarding Damaged or Expired Tanks
Follow the
steps below to transfer resin from your old tank to the new tank. If you
need to purchase a new or spare resin tank, you can do so in our
Form Store.
- Wear disposable powder-free gloves.
- Remove the build platform to prevent the possibility of resin on the platform dripping into the printer.
- Use the tabs on the front of the tank to remove it from the printer.
- Pour the resin from the old tank to the new tank or another
container. Pouring resin back into the original bottle may risk
contaminating the bottle with cured pieces.
- Gently run the scraper over the silicone layer in the base of the tank to push the resin into the new tank.
- Wipe the sides of the old tank with a paper towel.
- Place the new tank filled with resin back into the machine.
- Replace the build platform.
- Close your Form 1+.
- Place the old tank in sunlight to cure excess resin (a window sill is fine), and discard properly once dry. Do not pour liquid resin down the drain.
Cleaning the Resin Tank after a Failed Print
For successful prints, it is essential that the Form 2 resin tank remains clean and free of debris. Occasionally, a failed print will leave small, partially cured pieces of resin floating in the tank, or hard cured resin stuck to the PDMS in the base of the tank. It is good practice to inspect and clean the tank after every print.
When you find cured resin or debris in the tank, follow these steps to clean the tank:
1. Disengage Wiper
Pull the wiper toward the front of the printer to release the wiper's foot from the mount. Set the wiper aside, resting on the far right edge of the resin tank. Manually slide the wiper mount to the center before removing a resin tank.
2. Remove Failed Print
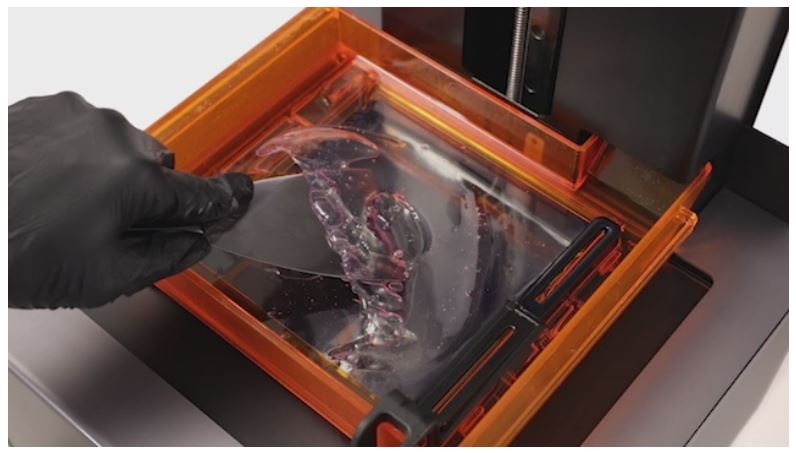
TIP
Using the Form Finish Kit scraper, very gently scrape across the PDMS layer with the blade at a low shallow angle.
Filter the Resin (Optional)
After removing the primary print failure, inspect the resin and tank for other small fragments. While the wiper will help keep the print area clear during printing, clean resin and optical transparency in the bottom of the resin tank are always the best way to ensure quality prints.
WARNING
If you see or feel any resin cured in your tank, it's essential to remove debris by cleaning the tank or the next print will fail. Use a paint filter with a 190 micron mesh size to thoroughly strain liquid resin.